Storing Uploaded Files and Serving Them in Express
Learn how to store uploaded files with multer, serve them as static assets with express.static, and apply security best practices for file uploads.
Handling file uploads in Express involves two things: storing the file somewhere on disk and making it accessible via a URL. This post covers both, using multer for uploads and Express's static file serving for access.
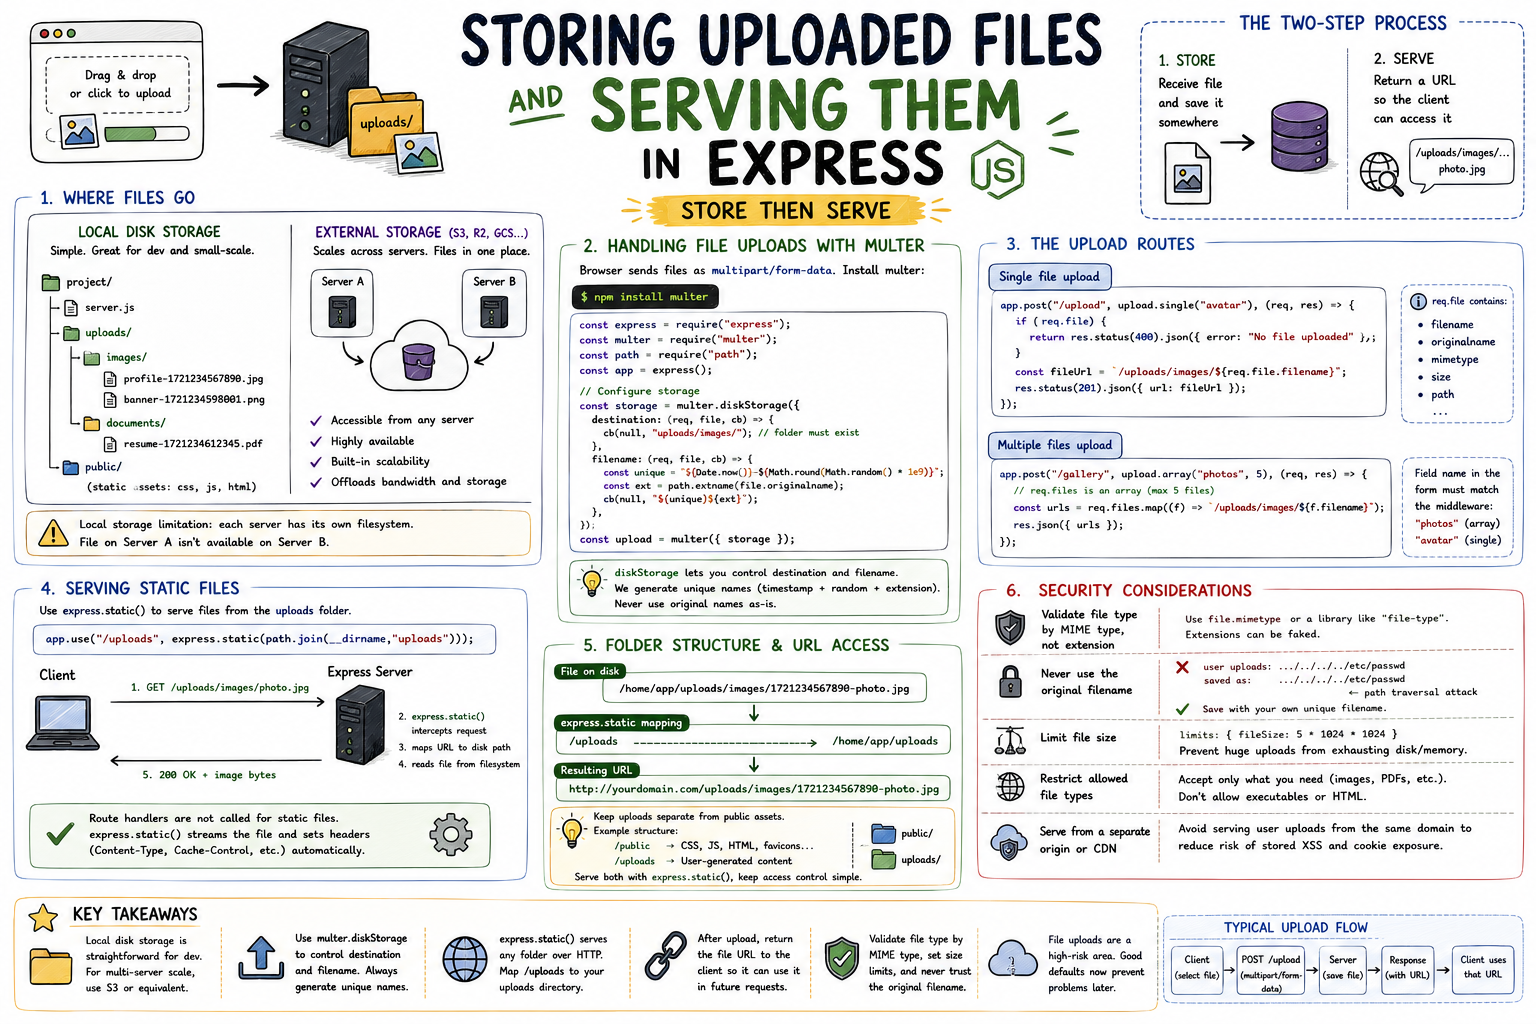
A file upload isn't just data in a request body. It's binary content that needs somewhere to live. When a user uploads a profile picture, your server receives the image, saves it somewhere, and then needs to hand back a URL so the client can display it. That two-step process, store then serve, is what this post covers.
Where Files Go: Local vs External Storage
The simplest approach is local disk storage: save uploaded files to a folder on the same server that runs your Express app. It's easy to set up and works well for development and small-scale production.
project/
├── server.js
├── uploads/            ← where uploaded files land
│   ├── images/
│   │   ├── profile-1721234567890.jpg
│   │   └── banner-1721234598001.png
│   └── documents/
│       └── resume-1721234612345.pdf
└── public/             ← static frontend assets
The limitation of local storage: if you scale to multiple servers, each server has its own filesystem. An image uploaded to Server A isn't available on Server B. For production at scale, external storage (AWS S3, Cloudflare R2, Google Cloud Storage) is the answer. Files live in one place, accessible from any server.
For this post: local disk storage. The concepts transfer directly when you swap to cloud storage.
Handling File Uploads with Multer
The browser sends files as multipart/form-data. Express doesn't parse that by default. multer is the standard middleware for handling it.
npm install multerconst express = require("express");
const multer = require("multer");
const path = require("path");
const app = express();
// Configure storage
const storage = multer.diskStorage({
destination: (req, file, cb) => {
cb(null, "uploads/images/"); // folder must exist
},
filename: (req, file, cb) => {
const unique = `${Date.now()}-${Math.round(Math.random() * 1e9)}`;
const ext = path.extname(file.originalname);
cb(null, `${unique}${ext}`);
},
});
const upload = multer({ storage });diskStorage gives you control over where each file lands and what it gets named. The filename callback generates a unique name by combining a timestamp and a random number, then preserving the original extension. Never save files with their original names as-is (more on why shortly).
The Upload Route
// Single file upload
app.post("/upload", upload.single("avatar"), (req, res) => {
  if (!req.file) {
    return res.status(400).json({ error: "No file uploaded" });
  }

  const fileUrl = `/uploads/images/${req.file.filename}`;
  res.status(201).json({ url: fileUrl });
});
upload.single('avatar') tells multer to look for a file in the field named avatar. After it runs, req.file contains metadata about the uploaded file: its filename, original name, mime type, and size.
For multiple files:
app.post("/gallery", upload.array("photos", 5), (req, res) => {
  // req.files is an array, max 5 files
  const urls = req.files.map((f) => `/uploads/images/${f.filename}`);
  res.json({ urls });
});
Serving Static Files
Once a file is saved to disk, you need Express to serve it over HTTP. express.static() does this in one line:
app.use("/uploads", express.static(path.join(__dirname, "uploads")));Now any file inside the uploads/ folder is accessible at a URL:
uploads/images/1721234567890-123456789.jpg
      │
      ▼
http://localhost:3000/uploads/images/1721234567890-123456789.jpg
Client Express Server
│ │
│ GET /uploads/images/photo.jpg │
│─────────────────────────────────►│
│ │ express.static() intercepts
│ │ maps URL to disk path
│ │ reads file from filesystem
│ 200 OK + image bytes │
│◄─────────────────────────────────│The route handler never runs for static files. express.static() intercepts the request, finds the file on disk, and streams it back directly. It also sets appropriate headers like Content-Type and Cache-Control automatically.
Folder Structure and URL Access
File on disk:
  /home/app/uploads/images/1721234567890-photo.jpg

express.static maps:
  /uploads ─────────────────► /home/app/uploads

Result URL:
  http://yourdomain.com/uploads/images/1721234567890-photo.jpg
Keep static assets and uploads in separate folders. Your public/ folder for frontend assets (CSS, JS, HTML) and an uploads/ folder for user-generated content. They can both be served with express.static() but keeping them separate makes access control easier later.
Security Considerations
File uploads are one of the most abused attack surfaces in web applications. A few practices that matter:
Validate file type by MIME type, not extension:
const upload = multer({
  storage,
  fileFilter: (req, file, cb) => {
    const allowed = ["image/jpeg", "image/png", "image/webp"];
    if (allowed.includes(file.mimetype)) {
      cb(null, true);
    } else {
      cb(new Error("Only JPEG, PNG, and WebP images are allowed"));
    }
  },
  limits: { fileSize: 5 * 1024 * 1024 }, // 5MB limit
});
A user can rename malicious.php to photo.jpg. Checking the extension catches nothing. Checking file.mimetype is more reliable. For production, validate with a library like file-type that reads the actual file bytes, since MIME types from the client can also be spoofed.
Never use the original filename:
user uploads: ../../../../etc/passwd
saved as:     ../../../../etc/passwd  ← path traversal attack
Generating your own filename (timestamp + random + extension) eliminates this class of attack entirely.
Limit file size. Without limits, a single large upload can exhaust memory or disk. The limits option in multer enforces a hard ceiling before the file reaches disk.
Don't serve uploads from the same origin as your app if possible. A stored XSS attack can embed an HTML file as an upload, and if it's served from your domain, it runs in the context of your site. Serving uploads from a subdomain or CDN isolates that risk.
┌──────────────────────────────────────────────────┐
│           Upload Security Checklist              │
│                                                  │
│  Validate MIME type, not just extension          │
│  Generate a new filename, never use original     │
│  Set a file size limit                           │
│  Restrict allowed file types to what you need    │
│  Serve uploads from a separate domain or CDN     │
└──────────────────────────────────────────────────┘
Key Takeaways
- Local disk storage is straightforward for development. For multi-server production, use S3 or equivalent.
- Use
multer.diskStorageto control upload destination and filename. Always generate unique filenames. express.static()serves any folder over HTTP. Map/uploadsto your uploads directory with one line.- After upload, return the file URL to the client so it can reference the file in future requests.
- Validate file type by MIME type and set size limits. Never trust the original filename.
File uploads are a surface where cutting corners has real consequences. Getting the storage structure right and the security defaults in place from the start is easier than retrofitting them after something goes wrong.