How DNS Resolution Works: Understanding the Internet's Phonebook
Learn how DNS translates domain names to IP addresses using dig commands. Explore root servers, TLD servers, and authoritative nameservers with practical examples.
A practical guide to understanding DNS resolution using the dig command, exploring how domain names are translated to IP addresses through root servers, TLD servers, and authoritative nameservers.
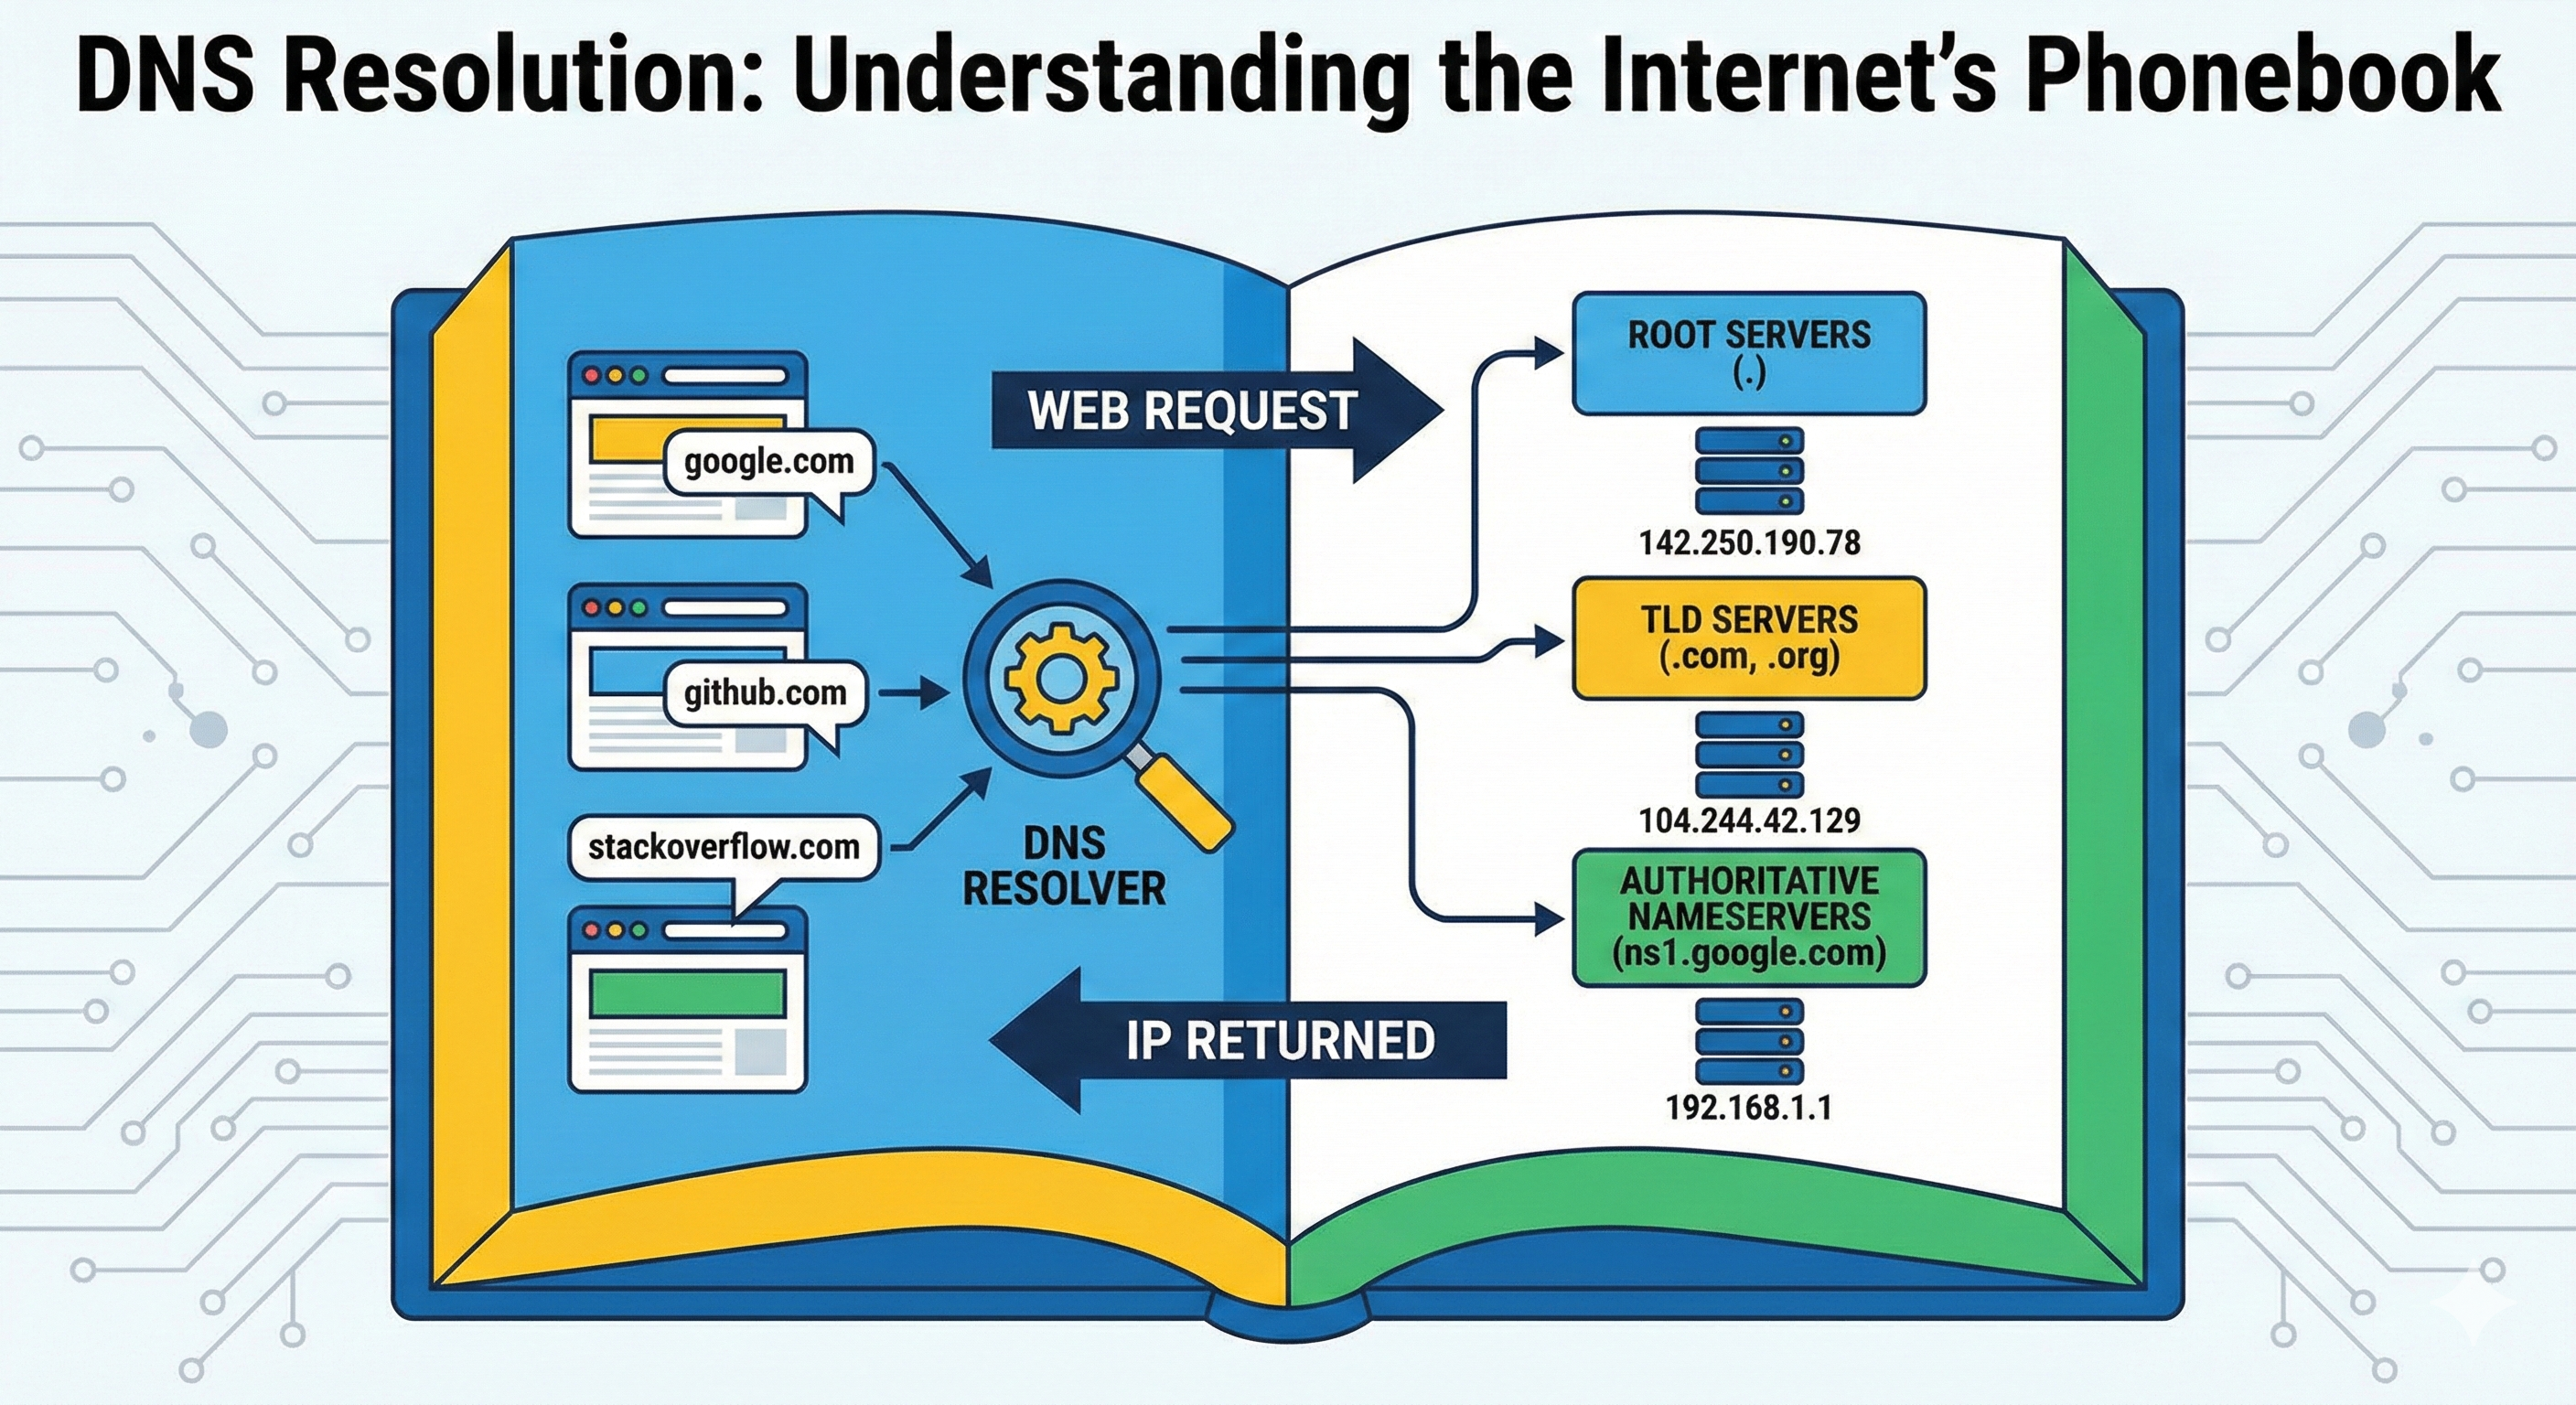
When you type google.com into your browser, have you ever wondered how your computer knows where to find Google's servers? The answer lies in the Domain Name System, one of the most critical yet invisible parts of the internet infrastructure. Understanding DNS resolution is not just theoretical knowledge; it's essential for debugging network issues, optimizing web performance, and designing distributed systems.
What is DNS and Why Name Resolution Exists
The Domain Name System is the Internet's phonebook. While humans prefer memorable names like github.com or stackoverflow.com, computers communicate using IP addresses like 192.168.1.1 or 2400:cb00:2048:1::c629:d7a2. DNS bridges this gap by translating human-readable domain names into machine-readable IP addresses.
Without DNS, you would need to memorize IP addresses for every website you visit. Imagine trying to remember that YouTube is at 142.250.190.78 or that Twitter is at 104.244.42.129. DNS servers eliminate this burden by maintaining massive distributed databases that map domain names to their corresponding IP addresses.
The dig Command: Your DNS Diagnostic Tool
The dig command (Domain Information Groper) is a powerful diagnostic tool that lets you peek behind the curtain of DNS resolution. It shows you exactly how DNS servers communicate and resolve domain names.
Basic syntax:
dig [server] [name] [type]Where:
[server]: The DNS server to query (optional)[name]: The domain name to look up[type]: The type of DNS record (A, NS, MX, etc.)
A simple query looks like this:
dig google.comThis command sends a DNS query and returns detailed information about how the domain was resolved, including query time, the DNS server used, and the IP address returned.
Understanding the DNS Hierarchy
Before diving into specific commands, it's crucial to understand that DNS operates as a hierarchical system with four key players:
DNS Recursive Resolver: Think of this as a librarian who receives your request and does the legwork to find the answer. Your ISP or services like Cloudflare (1.1.1.1) and Google (8.8.8.8) provide these resolvers.
Root Nameservers: These are like the library's main index, pointing you to the right section. There are 13 logical root server addresses (A through M), though physically there are over 1,500 servers worldwide using Anycast routing.
TLD Nameservers: Top-Level Domain servers handle specific extensions like .com, .org, or .net. They're like specific sections in the library.
Authoritative Nameservers: These are the final source of truth for a specific domain. They hold the actual DNS records and can definitively answer queries about their domains.
Step 1: dig . NS and Root Name Servers
Let's start our DNS journey at the very top of the hierarchy: the root servers.
dig . NSThis command queries for the root nameservers. The output shows all 13 root server addresses:
.                       87203   IN      NS      a.root-servers.net.
.                       87203   IN      NS      b.root-servers.net.
.                       87203   IN      NS      c.root-servers.net.
...
.                       87203   IN      NS      m.root-servers.net.
Why exactly 13? It's a fascinating engineering constraint. DNS originally used UDP packets limited to 512 bytes. Engineers calculated that 13 root server addresses, plus necessary header information was the maximum that could fit reliably in a single packet without fragmentation.
These root servers don't know where google.com lives, but they know who handles the .com top-level domain.
Step 2: dig com NS and TLD Name Servers
Next, we query the TLD servers for .com:
dig com NS @8.8.8.8Output:
com.                    21600  IN    NS    a.gtld-servers.net.
com.                    21600  IN    NS    b.gtld-servers.net.
com.                    21600  IN    NS    c.gtld-servers.net.
...
The .com TLD servers are responsible for knowing which authoritative nameservers handle each .com domain. They maintain records for millions of .com domains but don't store the actual IP addresses. Instead, they point you to the right authoritative nameserver.
The 21600 you see is the TTL (Time To Live) in seconds, indicating how long this information can be cached (48 hours in this case).
Step 3: dig google.com NS and Authoritative Name Servers
Now we're getting closer to our destination:
dig google.com NSOutput:
google.com.             20135   IN    NS    ns1.google.com.
google.com.             20135   IN    NS    ns2.google.com.
google.com.             20135   IN    NS    ns3.google.com.
google.com.             20135   IN    NS    ns4.google.com.
These are Google's authoritative nameservers. They are the final source of truth for google.com and all its subdomains. If you want to know the IP address of mail.google.com or docs.google.com, these servers have the answers.
NS (Name Server) records are crucial because they tell the DNS system who is authoritative for a domain. When you register a domain, you're essentially telling the TLD servers which nameservers to trust for your domain's information.
Step 4: dig google.com and the Full Resolution Flow
Finally, let's query for the actual IP address:
dig google.com @8.8.8.8This returns the A record (address record):
; <<>> DiG 9.18.39-0ubuntu0.24.04.2-Ubuntu <<>> google.com @8.8.8.8
;; global options: +cmd
;; Got answer:
;; ->>HEADER<<- opcode: QUERY, status: NOERROR, id: 54428
;; flags: qr rd ra; QUERY: 1, ANSWER: 1, AUTHORITY: 0, ADDITIONAL: 1

;; OPT PSEUDOSECTION:
; EDNS: version: 0, flags:; udp: 512
;; QUESTION SECTION:
;google.com.                    IN      A

;; ANSWER SECTION:
google.com.             118     IN      A       142.250.195.78

;; Query time: 22 msec
;; SERVER: 8.8.8.8#53(8.8.8.8) (UDP)
;; WHEN: Thu Jan 22 20:27:17 IST 2026
;; MSG SIZE  rcvd: 55
The ANSWER SECTION shows the IP address 142.250.195.78. Your browser can now make an HTTP request to this IP to load Google's homepage.
Tracing the Complete Path
To see the entire resolution chain in action, use the +trace option:
dig google.com +traceThis powerful command shows you every step:
- Query to root servers for
. - Root servers respond with
.comTLD nameservers - Query to
.comTLD servers - TLD servers respond with Google's authoritative nameservers
- Query to Google's nameservers
- Google's servers respond with the final IP address
The trace output walks you through exactly what a recursive resolver does behind the scenes, making visible what normally happens in milliseconds without you noticing.
Using Specific DNS Servers
You can also specify which DNS server to use:
dig @8.8.8.8 google.comThis queries Google's public DNS server directly instead of your default resolver. This is useful for debugging DNS propagation issues or comparing responses from different DNS providers.
How This Connects to Real Browser Requests
When you visit https://google.com in your browser, here's the invisible workflow:
- Your browser asks the recursive resolver: "What's the IP for google.com?"
- The resolver checks its cache; if not found, it performs the full resolution flow
- Root servers point to
.comTLD servers - TLD servers point to Google's authoritative nameservers
- Authoritative nameservers return the IP address
- The resolver caches this result and sends it back to your browser
- Your browser makes an HTTP request to that IP address
- Google's server responds with the webpage
All of this typically happens in under 50 milliseconds for cached responses, or a few hundred milliseconds for full resolution.
Practical Takeaways for System Design
Understanding DNS resolution has real-world implications:
Caching is Critical: Recursive resolvers cache DNS records based on TTL values. Lower TTLs mean more frequent queries but faster updates. Higher TTLs reduce DNS traffic but slow down propagation of changes.
Multiple Nameservers for Redundancy: Notice how domains have multiple NS records (ns1, ns2, ns3, ns4). This provides fault tolerance if one nameserver goes down.
Geographic Distribution: Using Anycast, DNS servers route queries to the nearest physical server, reducing latency and improving resilience.
DNS Propagation Delays: When you update DNS records, it can take time for changes to propagate worldwide because of caching at multiple levels.
Conclusion
DNS resolution is a masterpiece of distributed systems engineering. From the 13 logical root servers to TLD nameservers to authoritative servers, the system is designed for speed, reliability, and scalability. The dig command gives you x-ray vision into this process, transforming an invisible system into something tangible and debuggable.
Next time your website isn't loading, or you're designing a global application, you'll understand the critical role DNS plays and have the tools to diagnose and optimize it. The internet's phonebook might seem simple, but as we've seen, there's elegant complexity in translating names to numbers.